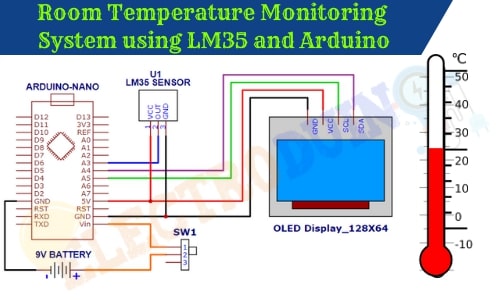
Room Temperature Monitoring System using LM35 Temperature Sensor and Arduino
Hello friends! Welcome back to ElectroDuino. This blog is base on Room Temperature Monitoring System using LM35 Temperature Sensor and Arduino. Here we will discuss Introduction to Room temperature monitoring system, Project Concept, Block Diagram, Components Required, Circuit Diagram, Working Principle, and Arduino code.
Introduction
In this project, we will learn how to make a Room temperature monitoring system using LM35 Temperature Sensor and Arduino. This system can measure room temperature continuously and show the value on a Display. The LM35 is a 3- terminal Temperature Sensor IC that can be used to sense ambient and surface temperatures. It can measure temperature in the range of -55°C to 150°C. This sensor provides an analog output voltage that proportional to the temperature. So, it is a perfect sensor to measure Room temperature. Here we will build a very small and portable Temperature Monitoring System/Device. It can be easily used in offices, schools, buildings, and industries to measure temperature.
Project Concept
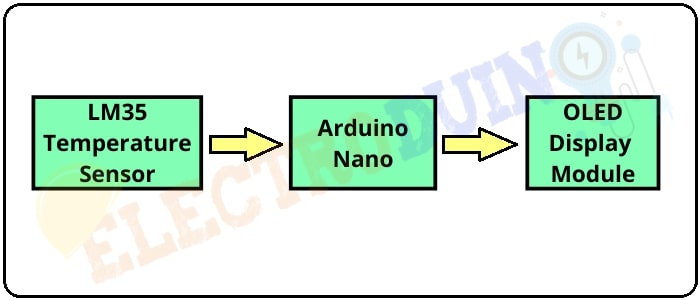
This is a very simple project, 3 key components are needed to build it, these are LM35 Temperature Sensor, Arduino Board, and OLED Display Module. The LM35 sensor measures the temperature around it and produces output voltage. The Arduino Board is the main microcontroller, it controls the whole system. Here we will use Arduino Nano, you can use other types of Arduino Board like Arduino Uno, Mega, etc. It will read output data from the Sensor and calculate the temperature value using this output data. Then it sends the Temperature value to the OLED Display. We will see this value on the Display.
Block Diagram of Room Temperature Monitoring System
Components Required
| Components Name | Quantity |
| Arduino Nano | 1 |
| LM35 Temperature Gas Sensor | 1 |
| 0.96 inch I2C OLED display | 1 |
| Slide Switch | 1 |
| 9V Battery with Battery connector | 1 |
| PCB Zero board | 1 |
| Connecting wires | As required in the circuit diagram |
Tools Required
| Tools Name | Quantity |
| Soldering Iron | 1 |
| Soldering wire | 1 |
| Soldering flux | 1 |
| Soldering stand | 1 |
| Multimeter | 1 |
| Desoldering pump | 1 |
| Wirecutter | 1 |
Required Library
We need to add 2 libraries in Arduino IDE software. These are:
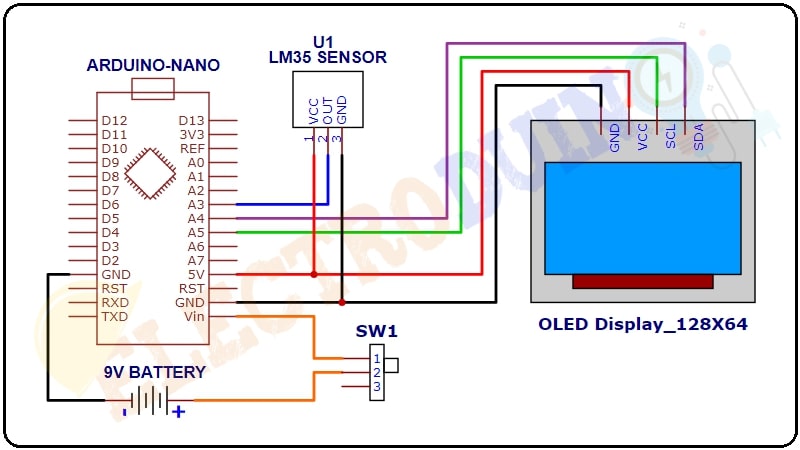
Circuit Diagram of Room Temperature Monitoring System using LM35 Temperature Sensor
Working Principle of Room Temperature Monitoring System
The LM35 is an analog Temperature Sensor. Its output voltage is directly proportional to the temperature. The output voltage will be a rise of 10mV (0.01V) for every 1°C rise in temperature. In this project, the LM35 Sensor Output Pin is connected to the Analog Pin “A3” of the Arduino Nano. The Arduino Nano has an in-built 10 bit ADC (analog-to-digital converter), which converts the analog output of LM35 to digital output form (0-1024 bits).
After read the Data from the output pin of LM35, Arduino calculates the Temperature using some simple formulas. These formulas are used in Arduino Code/Programing.
First of all, Arduino calculate the temperature in Degree Celsius format. The formula is:
Temperature(C) = ((analogRead * 5.0)/1024)*100.0 Degree Celsius
We also want to print the Temperature Value in Fahrenheit format. So, we also add another formula in the Arduino code/Programming, which converts the temperature value Celsius to Fahrenheit. The formula is:
Temperature (F) = {(C *1.8) +32} Fahrenheit
Where C is the temperature value in Degree Celsius.
After the Temperature Calculation the Arduino print this Value on OLED Display Module.
Arduino Code
 /* Air Pollution Monitoring System
    using Arduino and MQ135 Air Quality Sensor
    www.Electroduino.com
 */
 //OLED Display libraries
#include <SPI.h>
#include <Wire.h>
#include <Adafruit_GFX.h>
#include <Adafruit_SSD1306.h>

#define SCREEN_WIDTH 128    // OLED display width, in pixels
#define SCREEN_HEIGHT 64    // OLED display height, in pixels
#define OLED_RESET 4
Adafruit_SSD1306 display(SCREEN_WIDTH, SCREEN_HEIGHT, &Wire, OLED_RESET);

int SensorPin = A3;// Sensor pin connected to Analog pin "A3"

float sensorValue;
float voltageOut;

float temperatureC;
float temperatureF;

void setup()
{
  pinMode(SensorPin, INPUT); // initialize digital pin SensorPin as an input.

  //Start serial communication between arduino and your computer
  Serial.begin(9600);
  //initialize with the I2C addr 0x3C (128x64)
  display.begin(SSD1306_SWITCHCAPVCC, 0x3C);
  display.clearDisplay();
  delay(10);
  // Print text on display
  display.clearDisplay();
  display.setTextSize(1);
  display.setTextColor(WHITE);
  display.setCursor(20,0);
  display.println("ELECTRODUIN0"); // Print text
  display.display();
  display.setTextSize(1);
  display.setTextColor(WHITE);
  display.setCursor(30,19);
  display.println("Temperature");
  display.display();
  display.setTextSize(1);
  display.setTextColor(WHITE);
  display.setCursor(10,35);
  display.println("Monitoring System");
  display.display();
  delay(5000);
  }


  void loop()
  {
    // Read Senso value
    sensorValue = analogRead(SensorPin);
    // calculate temperature in Degree Celsius
    temperatureC = ((sensorValue * 5.0) / 1024)*100.0;
    // calculate temperature in Fahrenheit
    temperatureF = (temperatureC * 1.8) + 32;

    // Print temperature values on Serial Monitor Window
    Serial.print("Temperature(ºC): ");
    Serial.print(temperatureC);
    Serial.print("  Temperature(ºF): ");
    Serial.print(temperatureF);

     // clear display
    display.clearDisplay();

    // display temperature Celsius
    display.setCursor(0,0);  //oled display
    display.setTextSize(2);
    display.setTextColor(WHITE);
    display.println("Room Temp");
    display.setCursor(0,25);  //oled display
    display.setTextSize(2);
    display.setTextColor(WHITE);
    display.print(temperatureC);
    display.print(" ");
    display.setTextSize(1);
    display.cp437(true);
    display.write(167);
    display.setTextColor(WHITE);
    display.setTextSize(2);
    display.print("C");
    display.display();

// display temperature Fahrenheit
    display.setCursor(0,0);  //oled display
    display.setCursor(0,45);  //oled display
    display.setTextSize(2);
    display.setTextColor(WHITE);
    display.print(temperatureF);
    display.print(" ");
    display.setTextSize(1);
    display.cp437(true);
    display.write(167);
    display.setTextColor(WHITE);
    display.setTextSize(2);
    display.print("F");
    display.display();
    delay(2000);
    }