
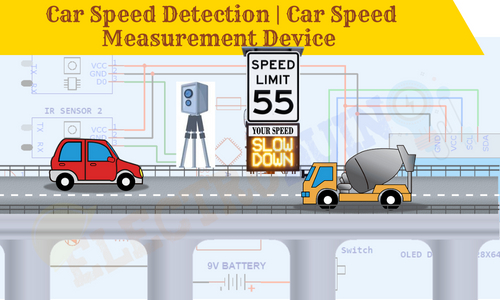
Car Speed Detection | Car Speed Measurement Device
Hello friends! Welcome back to ElectroDuino. This blog is based on the Car Speed Detection | Car Speed Measurement Device Arduino and IR Sensor. Here we will discuss the Introduction to Car Speed Detection | Car Speed Measurement Device with Over Speed Indicator, Project Concept, Block Diagram, Components Required, Circuit Diagram, Working Principle, and Arduino Code.
Introduction
Every country has different rules for driving cars on the roads. But the most common and important rule in any country is the vehicle speed limit on particular roads. Because a high-speed vehicle can happen a road accident and can make huge damage. For this reason, the patrolling officers are using a car speed radar gun and check car speed manually. This is very difficult to check one by one vehicle speed for the patrolling officers.
That’s why we will make the Car Speed Detection | Car Speed Measurement Device with Over Speed Indicator project using Arduino and IR Sensor. We can be placed this device beside the road. Which can measure the vehicle speed automatically and show the vehicle speed on a display. This device has one more feature, when any vehicle crosses the speed limit then it indicates by a Red light.
Project Concept Car Speed Detection | Car Speed Measurement Device
The key components of the project are two IR sensors, Arduino, LCD Display, and LEDs. IR sensors are used to detect vehicles. The project Concept is very easy, here we will measure the speed of a vehicle Using the famous formula of Speed, Distance, and Time. We know that Speed=Distance/Time. So we need to place these sensors on one side of the road at a particular Distance. When a vehicle passes in front of these sensors. Then the Arduino measures the detection time of these sensors. Now the Arduino calculates the vehicle speed by using a simple distance-time relationship formula. Then print the vehicle speed on the LCD display. The Red LED and Buzzer are used as Over Speed Indicators. When any vehicle crosses the speed limit then the Red LED and Buzzer will turn on.
This project is sponsored by PCBWay.com. It’s a Professional grate PCB prototype service company. They are providing you 10 high-quality PCBs at only 5$. At first register on the website, then fill in all the specifications like Dimensions, Layers, Thickness, color, and Quantity. In the last upload your Gerber files and place your Order Now. After completing all the processes, they produce your PCB prototype within 24 hours.
So, order now to get a high-quality PCB prototype quickly from PCBWay.com

Block Diagram of Car Speed Detection | Car Speed Measurement Device

Components Required
| Components Name | Quantity |
| Arduino nano | 1 |
| IR Sensor Module | 2 |
| 0.9″ OLED Display | 1 |
| Red LED | 1 |
| Green LED | 1 |
| 220 ohm Resistor | 2 |
| Buzzer | 1 |
| 9v Power Supply | 1 |
| PCB Zero board | 1 |
| Connecting wire | As required in the circuit diagram |
Tools Required
| Tools Name | Quantity |
| Soldering Iron | 1 |
| Soldering wire | 1 |
| Soldering flux | 1 |
| Soldering stand | 1 |
| Multimeter | 1 |
| Desoldering pump | 1 |
| Wirecutter | 1 |
Circuit Diagram of Car Speed Detection | Car Speed Measurement Device using Arduino and IR Sensor

Working Principle of Car Speed Detection | Car Speed Measurement Device using Arduino and IR Sensor
After connecting all comments according to the circuit diagram and uploading the Arduino Code now our Car Speed Detection | Car Speed Measurement Device is ready for work. First of all, we need to Place the IR Sensor Module on one side of the road at some distance apart. Here we have kept a distance of 30 cm between the Sensors. Now Connect the 9v Power supply to the circuit and turns on the Slide Switch, At the same time the IR Sensor 1 and IR Sensor starts detecting obstacles (vehicle) and generate Output from the data pin. IR Sensor 1 and IR Sensor 2 are connected to the Digital Pin D8 and D7 respectively. Arduino continuously reads the output values as the inputs from IR Sensors.
In my case, the IR Sensor gives a High (+5V) Output when it doesn’t detect any obstacles and Gives a Low (0V) Output when it detects an obstacle.
When a vehicle/car moves infront of the IR Sensor 1, then it generates Low (0v) output signal from the data Pin and gives it to the Arduino. Now the Arduino captures a time stamp at the moment the car leaves the IR Sensor 1. Then the Arduino recorded another time stamp when the vehicle/car reaches infront of the IR Sensor 2. We have used Millis() function in Arduino code for capturing the time stamps by Arduino.
Then the Arduino calculates the time between the two stamps in milliseconds and converts this time into Seconds by dividing 1000. Here we have assumed the distance as 0.3 meters (30cm = 0.3m) between the two IR sensors and displays. So, the Arduino gets the Distance and Time which is covered by the car/vehicle. Now Arduino Calculates the speed of the car/vehicle using the Speed=Distance/Time (S=D/T) formula.
In this project, we set the speed limit at 60 Kmph. So, Whenever the Arduino detects the car/vehicle Speed over 60Kmph, the Arduino print an “Over Speed Detected and Go Slow” message on LCD Display and gives High input to the Red LED to turn on. The Red LED is used for Indication Over Speeding. When the Speed is under 60Kmph, this time Arduino gives High input voltage to the Green LED to turn on, which indicates the speed is normal.
Arduino Code
ff2b05


