
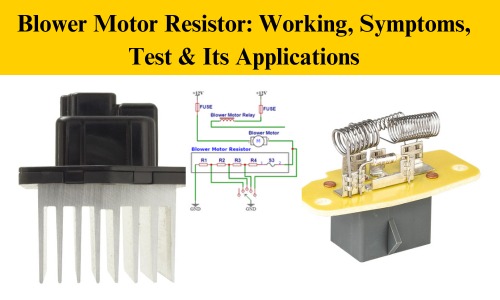
Blower Motor Resistor: Working, Symptoms, Test & Its Applications
Hello friends! Welcome back to ElectroDuino. This basic electronics blog tutorial is based on the Blower Motor Resistor: Working, Symptoms, Test & Its Applications. In this article, we will discuss What is a Blower Motor Resistor, Construction, Working, Causes of failure, Troubleshooting, Testing, Replacement and Application.
This blog tutorial is sponsored by Vemeko Electronics. VEMEKO Electronics is an e-commerce-based seasoned distributor of high-quality electrical components. They offer a comprehensive selection of products with efficient self-customized service to help you save time, effort, and money. Both order preparation and delivery are meticulous. The main advantages of this platform are a robust enterprise management system, warehouse management system, stringent product quality inspection system, and convenient delivery system. Find what you need quickly, explore detailed product information, and place your order with confidence. Visit Vemeko Electronics today and discover a world of electrical components where quality meets convenience.
Introduction:
In the realm of automotive heating, ventilation, and air conditioning (HVAC) systems, the Blower Motor Resistor plays a crucial role. One component that often goes unnoticed but plays a vital role in regulating the fan speed is the blower motor resistor. This often-overlooked component is responsible for regulating the fan speed, influencing the airflow within your car. It stands as a silent architect of comfort within your vehicle’s cabin.
What is a Blower Motor Resistor?
The blower motor resistor is a small but vital component of the heating, ventilation, and air conditioning (HVAC) system in a car. Its primary function is to control the speed of the blower motor, which, in turn, regulates the amount of air flowing into the car cabin. By providing multiple speed settings, the resistor ensures that maintains a comfortable temperature inside the car, regardless of the weather conditions outside. This allows you to adjust the fan speed according to your comfort level.
This means you can enjoy a comfortable driving experience, whether you’re facing scorching summers or chilly winters.
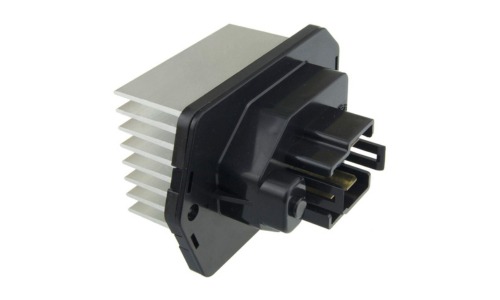
Construction of Blower Motor Resistor
The Blower Motor Resistor is a compact unit constructed with resistive wire coils, a thermal fuse, and an electrical connector. These components work in harmony to ensure the smooth functioning of the resistor and, by extension, your car’s climate control. Here’s a breakdown of its key components:
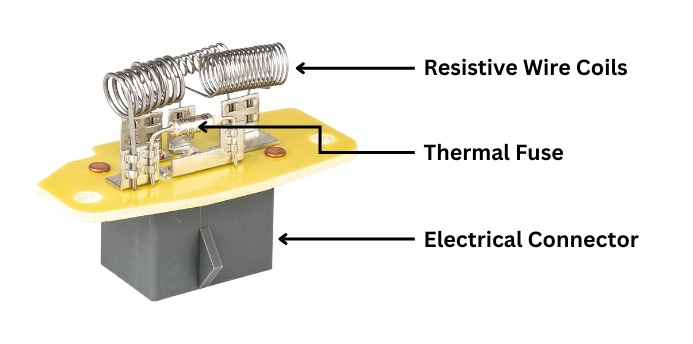
- Resistive Wire Coils:
At the heart of the resistor are coils of resistive wire. These wires act as a pathway for electrical current, with their resistance determining the amount of current that passes through. As the current passes through these coils, the resistance can be adjusted to control the fan speed effectively.
- Thermal Fuse:
To ensure safety and prevent overheating, many Blower Motor Resistors incorporate a thermal fuse. This small but critical element acts as a safety measure, interrupting the electrical circuit if the temperature rises beyond a certain threshold. It not only protects the resistor itself but also safeguards the entire HVAC system from potential damage.
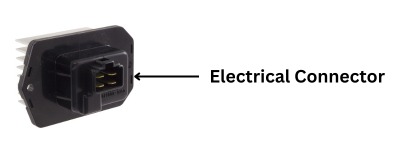
- Electrical Connector:
An integral part of the Blower Motor Resistor’s constitution is the electrical connector that facilitates between the Blower Motor Resistor and the vehicle’s electrical system. This connector serves as the link through which the resistor receives the necessary electrical signals to regulate fan speed. This connector facilitates the transmission of electrical signals, allowing for seamless communication and control. It allows the controlled flow of electricity, enabling the resistor to regulate the fan speed based on the settings chosen by the driver.
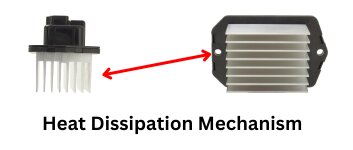
- Heat Dissipation Mechanism (Optional):
Some Blower Motor Resistors feature additional heat dissipation mechanisms, such as heat sinks. These elements effectively disperse the heat generated during operation, ensuring the resistor remains cool and efficient.
How Does a Blower Motor Resistor Work?
The blower motor resistor operates by adjusting the electrical resistance in the circuit. It achieves this by using a series of resistors, each offering a different level of resistance. As you select different fan speeds on your dashboard (HVAC controls), the resistor alters the amount of current flowing to the blower motor. This change in current dictates the speed at which the motor operates, resulting in varied airflow through the vents.

User Input:
When the driver adjusts the fan speed using the controls on the car dashboard, the system registers the input and sends the signal to the Blower Motor Resistor.
Resistant broce Adjustment:
Now the resistive wire coils come into action, adjusting the electrical resistance within the circuit. This adjustment is crucial, as it directly influences the current flow to the blower motor. The higher resistance slows down the flow of current, while the lower resistance allows it to surge.
Fan Speed Regulation:
The altered current dictates the speed of the blower motor, subsequently determining the volume of air pushed through the HVAC system. Higher resistance results in slower fan speeds, while lower resistance allows for a brisker flow.
What Causes a Blower Motor Resistor to Fail
1. Overheating:
One of the primary reasons behind Blower Motor Resistor failure is overheating. Continuous current flowing through the resistor wire coil of the blower motor resistor can generate excess heat. Over time, this heat can lead to damage, particularly if the thermal fuse, designed to safeguard against overheating, becomes compromised.
2. Age and Wear:
Like any mechanical component, the Blower Motor Resistor is subject to wear and tear over its operational life. Constant adjustments to fan speeds, temperature changes, and the general aging of the resistor can contribute to its gradual degradation.
3. Electrical Spikes or Surges:
Fluctuations in the electrical system, including sudden surges in voltage, can place undue stress on the Blower Motor Resistor. Sudden increases in voltage can lead to excessive current flow, causing damage to the resistive wire coils and other components.
4. Moisture and Corrosion:
The environment within your vehicle can be challenging, with temperature variations and occasional exposure to moisture. Over time, this exposure can lead to corrosion of the Blower Motor Resistor’s electrical connectors and terminals. Corrosion compromises the conductivity and can impede the proper functioning of the resistor.
5. Continuous High Loads:
Operating the HVAC system consistently at maximum fan speed places a continuous high load on the Blower Motor Resistor. This can accelerate the wear on the resistive wire coils and other internal components, eventually leading to failure.
6. Debris Accumulation:
Over time, debris such as dust, dirt, or leaves can accumulate in and around the Blower Motor Resistor. This build-up can obstruct proper airflow and ventilation, causing the resistor to overheat and potentially fail.
7. Manufacturing Defects:
In some cases, manufacturing defects or subpar quality in the construction of Blower Motor Resistors can contribute to premature failure. Regular inspections and cleaning can mitigate these issues and prolong the life of the Blower Motor Resistor.
8. Ignoring Early Warning Signs:
Disregarding common signs of a failing Blower Motor Resistor, such as inconsistent fan speeds or strange noises, can exacerbate underlying issues. Addressing problems promptly through diagnostics and repairs can prevent further damage and extend the lifespan of the resistor.
Common Signs of a Faulty Blower Motor Resistor (Troubleshooting)
1. Inconsistent Fan Speeds:
One of the earliest indicators of a failing Blower Motor Resistor is the inconsistency in fan speeds. If you notice that certain fan speeds are not functioning or the airflow is inconsistent when adjusting the fan speed, it could be a sign of a failing resistor.
2. Non-Responsive Controls:
Difficulty adjusting the fan speed through your dashboard controls is another red flag. If you find that turning the knob or pressing the buttons has little to no effect on the airflow, it’s worth investigating the health of the Blower Motor Resistor.
3. Noisy Operation:
Unusual noises from the HVAC system, such as a squeak, buzzing, or humming sound, could be a result of a faulty blower motor resistor.
4. Thermal Overload:
The blower motor resistor is prone to thermal overload due to its constant exposure to temperature changes. This can lead to burnout or damage over time.
5. Limited Airflow:
A decrease in the overall airflow from the vents, particularly on higher fan speed settings, can be a symptom of a failing Blower Motor Resistor. Reduced functionality in regulating the blower motor’s speed directly impacts the volume of air circulated through the system.
6. Blower Motor Runs Continuously:
If your blower motor runs continuously, even when the HVAC system is off, it may indicate a malfunctioning resistor. This can lead to a drained battery and discomfort inside the vehicle.
How to Test a Blower Motor Resistor
Common signs of a failing resistor include inconsistent fan speeds, non-responsive controls, or unusual noises from the HVAC system. Testing allows you to detect the issue, ensuring an accurate diagnosis before proceeding with repairs or replacements.
>> Tools You’ll Need:
To embark on the testing process, gather the following tools:
- Multimeter: Essential for measuring electrical resistance.
- Screwdriver: For accessing the Blower Motor Resistor.
- Vehicle Service Manual: Contains specific testing procedures for your make and model.
>> Preliminary Checks:
Before testing, conduct some preliminary checks:
- Visual Inspection: Examine the resistor for physical damage, burnt components, or signs of overheating.
- Smell Check: Detect any unusual odors, which could indicate overheating or electrical issues.
- Fan Speed Observation: Note any inconsistencies or non-responsive controls.
>> Step-by-Step Testing Procedure:
Step 1: Locate the Blower Motor Resistor
The first step is to locate the Blower Motor Resistor. It’s commonly found near the blower motor, often nestled within the HVAC system. Refer to your vehicle’s service manual for specific instructions on locating the resistor.
Step 2: Disconnect the Electrical Connector
Carefully disconnect the electrical connector attached to the Blower Motor Resistor. This step ensures that the resistor is isolated from the rest of the circuit, allowing for accurate testing.
Step 3: Set the Multimeter to Ohms (Ω)
Set your multimeter to the resistance (ohms) setting. This prepares it for measuring the resistance.
Step 4: Measure Resistance
Touch the multimeter probes to the terminals on the Blower Motor Resistor. Take readings for each resistor coil (speed setting) to ensure consistency. Compare the measured resistance values with those specifications outlined in your vehicle’s service manual. Deviations from these values can indicate a faulty resistor.
Step 6: Multimeter Continuity Test
Set your multimeter to the Continuity Test setting. Now this is ready for Continuity Testing of the circuit.
Step 5: Check for Continuity
Place the multimeter probes on each end of the thermal fuse. A continuous beep indicates a functional fuse, while silence suggests a blown fuse.
>> Interpreting Results:
Normal Resistance Values:
If the resistance values match those specified in the service manual, and continuity is present, the Blower Motor Resistor is likely in good condition.
Deviation from Specifications:
Deviations may indicate a faulty resistor that requires replacement. Refer to your service manual for guidelines on acceptable ranges and replacement procedures.
Replacement Process of Blower Motor Resistor
1. Find the Location:
Refer to your vehicle’s service manual to identify the exact location of the Blower Motor Resistor. It is typically found near the blower motor or within the HVAC ductwork.
2. Disconnect the Electrical Connector:
Before replacement, disconnect the electrical connector to ensure a safe working environment.
3. Remove and Replace:
Follow the step-by-step instructions in your service manual to remove the faulty Blower Motor and replace it with a new, compatible unit. First Unbolt or unclip the Blower Motor Resistor from its housing. Replace it with a new resistor that matches the specifications outlined in your service manual.
4. Reconnect and Test:
Reconnect the electrical connector and conduct a test to ensure the new Blower Motor Resistor functions correctly. Check for responsive fan speeds and consistent airflow.
Application
Blower Motor Resistors find application in a wide range of vehicles, from compact cars to trucks and SUVs. Understanding the specific make and model compatibility is crucial when sourcing a replacement resistor.